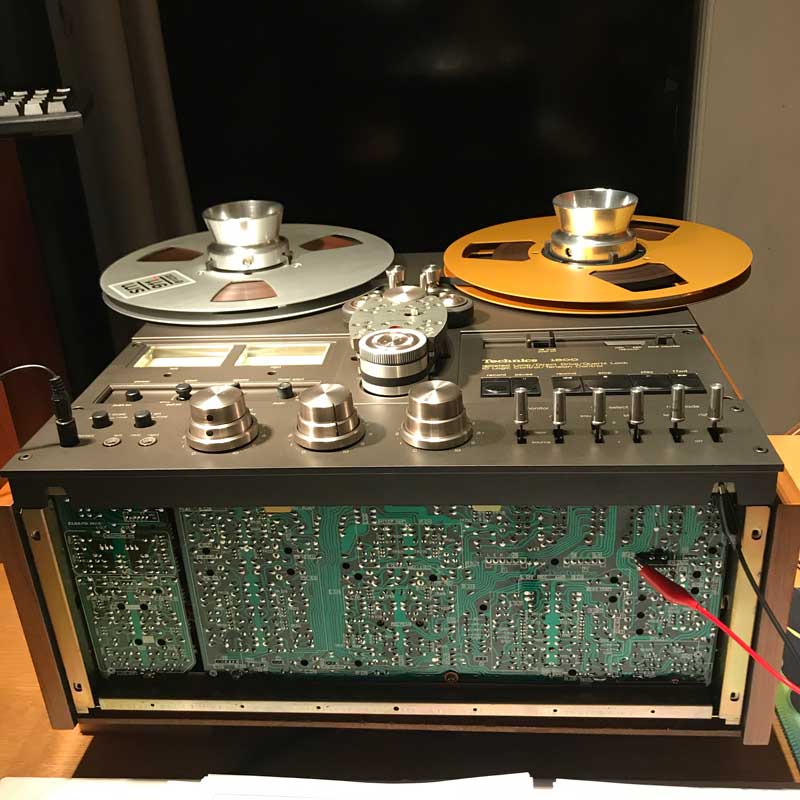
The Technics RS 1500 Project – Technics RS-1500 Tape Recorder
The Technics RS 1500 Project: Introduction
I will forever cherish the memory of March 9, 2017. On that day, I encountered a Technics RS 1500 for the very first time in a second-hand hifi shop in Shanghai.
The store was a treasure trove of vintage analog equipment, boasting an impressive array of tape decks from brands like Studer, Revox, Teac, Telefunken, Digitec Schlumberger, and Denon.
Amidst this selection, it was the Technics RS-1500 tape recorder that captured my undivided attention. Intrigued, I requested the shop owner to set up the machine, and within a few minutes, I was utterly captivated by the listening experience.
On that memorable day, I made a significant purchase: two Technics tape decks, one RS-1500 and one RS-1506.
These two models are nearly identical, with the key distinction being their head blocks: the RS-1506 records in 4-track, while the RS-1500 records in 2-track.
A few months later, after indulging in extensive use of these sizable additions to my studio, it became evident that I needed to address several issues to restore them to their original specifications:
1. The brake pads had worn out, causing annoying tape slack during fast forward and rewind.
2. The machines exhibited sluggish responsiveness overall.
3. The heads showed a 3mm flat spot, impacting their performance.
4. While the sound quality was good, I yearned for an audio experience of pure bliss.
Motivated to address these issues, I embarked on what would become the Technics RS 1500 Project.
In the following sections of this article, I will guide you through the six primary stages of the restoration process. This way, you can gain insight into the scope of the work required and potentially save time if you choose to undertake a similar endeavor.
Let’s dive in!
Technics RS 1500 Project 1: Tape Path Cleaning
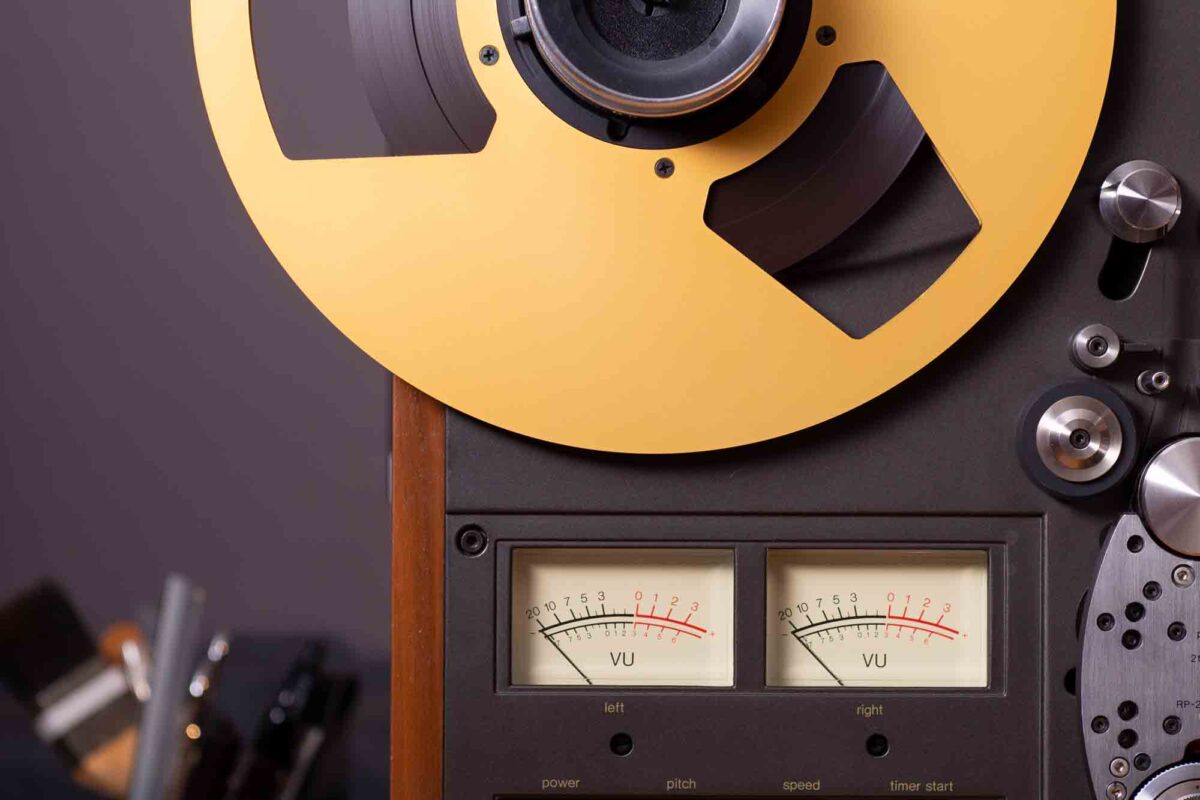
The degree of perfection of magnetic recording and playback is extremely dependent upon having the oxide surface of the tape pressed firmly in intimate contact to the head pole at the gap location. Any slight separation, even on the order of a micron, will reduce recording and playback efficiency, particularly at higher audio frequencies. Therefore maintaining a clean tape path, free from tape oxide buildup, is essential for keeping your deck operating at its best.
To clean the heads, guides, metal rolling tensioners, and capstan, you’ll need high purity isopropyl alcohol. I read 95% purity or higher is best. Apply it using lint-free cotton swabs (Q-tips) by wetting the swab with alcohol and gently removing the oxide buildup from the relevant parts.
However, avoid using isopropyl alcohol for cleaning the two pinch rollers, as it may cause them to dry out and crack. The rubbery material used for these rollers may be uncertain, so I opted for a cautious approach. I used Q-tips soaked in soapy, filtered water to clean the pinch rollers and then rinsed them gently with Q-tips soaked in filtered water.
Technics RS 1500 Project 2: Complete Deck Recapping
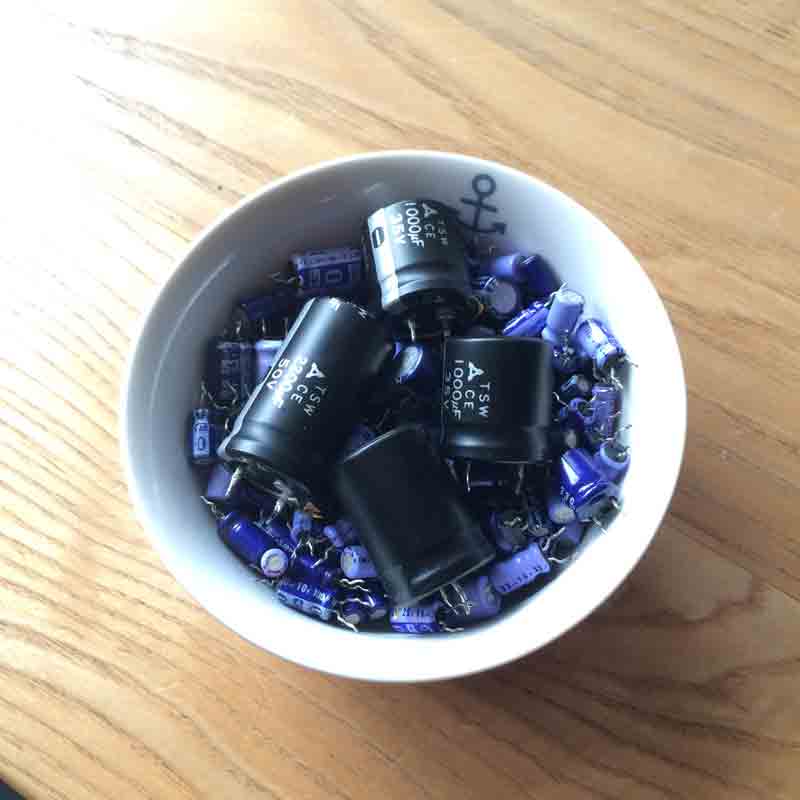
Like many vintage equipment, the Technics RS 1500 requires a comprehensive replacement of its electrolytic capacitors. Over time, these capacitors are prone to leakage, potentially leading to various issues such as damage to other components, harm to the PCBs due to electrolyte leakage, and compromised equalization and distortion in the audio output.
To get started, the first step is to obtain the service manual, which you can download in PDF format from these links:
Technics RS 1500 Service Manual pdf (part 1)
Technics RS 1500 Service Manual pdf (part 2)
Please be aware that this is the service manual for the Technics RS-1500 US model.
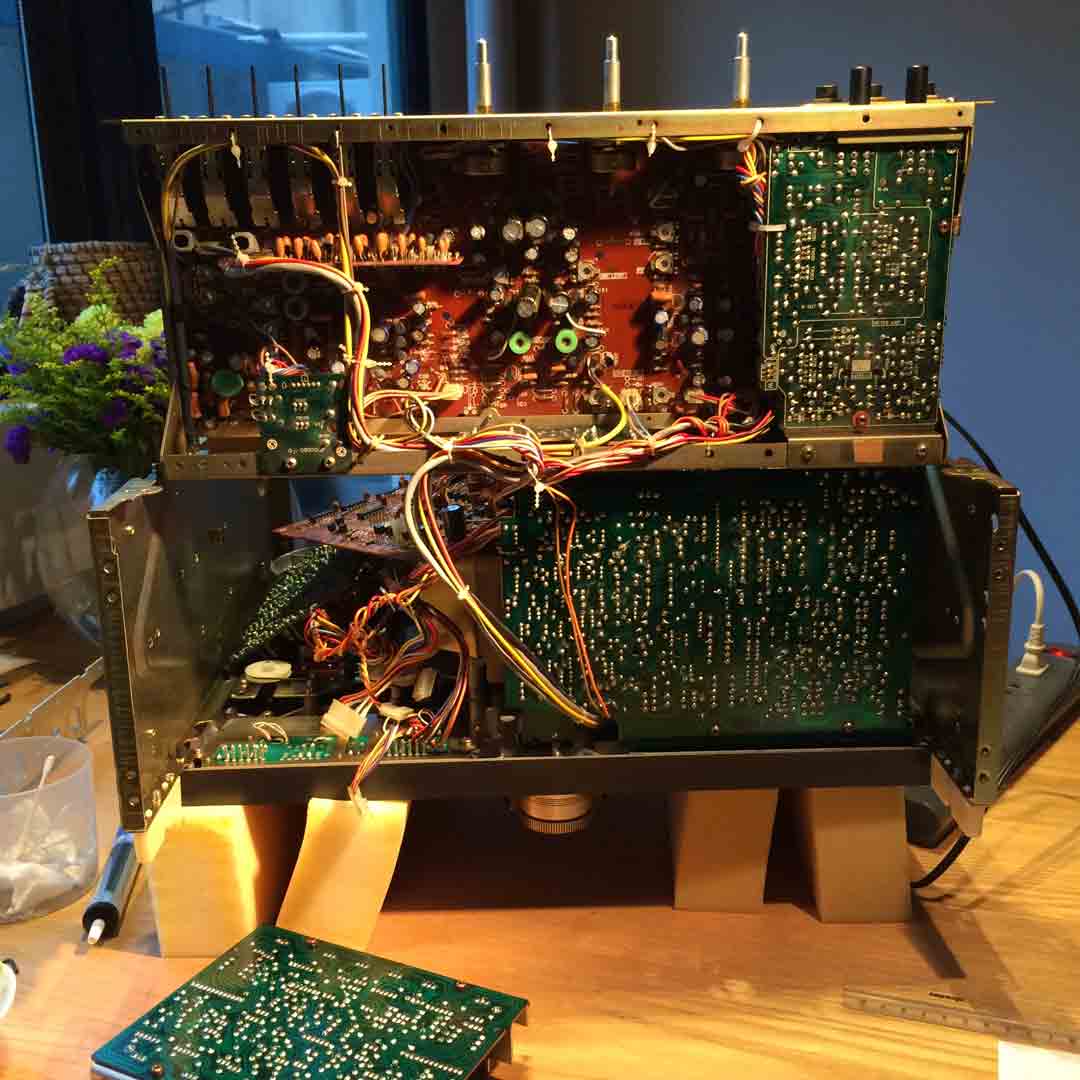
Performing a complete recap on this gear is a meticulous process, involving the replacement of approximately 130 capacitors.
During the recap process, I encountered some disparities between the schematics and the actual board values. Therefore, it’s crucial to make sure you replace each capacitor with the same on-board capacitance value.
Also I strongly recommend to take pictures along the disassembly process, the Technics RS 1500 is intricate and it is easy to become clueless about a connector or an enigmatic screw.

For the power supply smoothing capacitors, I opted for Nichicon KG Type III (Super-Through), while for the remaining components, I used a combination of Elna (Silmic II), Nichicon Muze KZ, and Nichicon ES for bipolar capacitors.
To assist you in your own recap project, I’ve provided a capacitor listing that I started with.
While it may not be entirely accurate for your specific model, it should serve as a helpful reference point.
You can access the listing here: Technics RS 1500 Capacitors List.
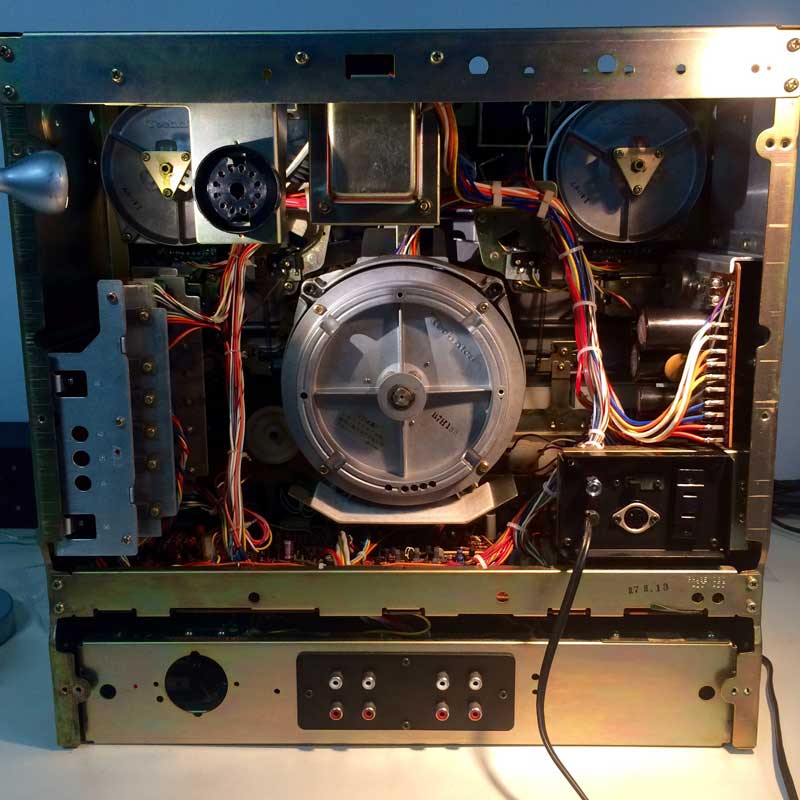
Technics RS 1500 Project 3: Transport Calibration
After the replacement of all electrolytic capacitors, the next step involves calibrating the transport system, which should be relatively straightforward if the recapping process went smoothly.
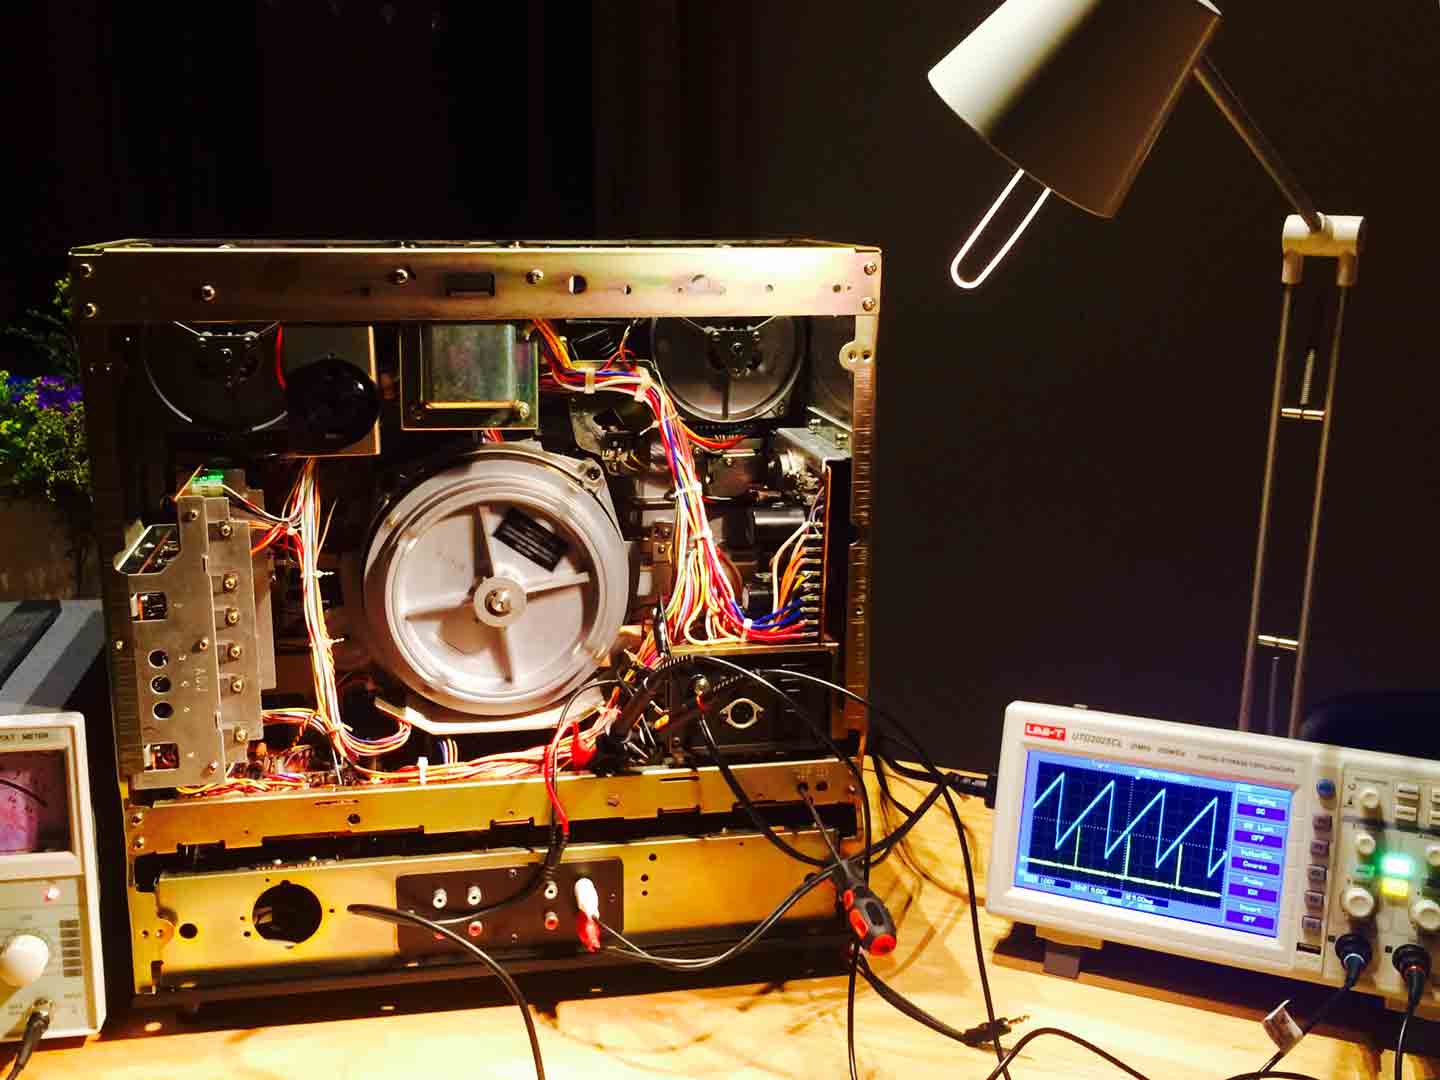
Adjustment of Capstan-Motor-Control Circuitry:
This calibration ensures the flawless operation of the capstan motor. Connect a dual-trace oscilloscope to the TP902 & TP907 points on the capstan control board and adjust the sawtooth signal to fall within the 5-10V range. Then, fine-tune the pulse signal to intersect the sawtooth at 7.5V. For detailed instructions, please consult page 21 of the service manual (part 2).
Tape Tension Adjustment:
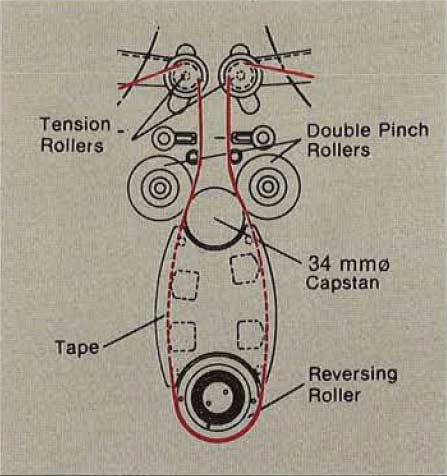
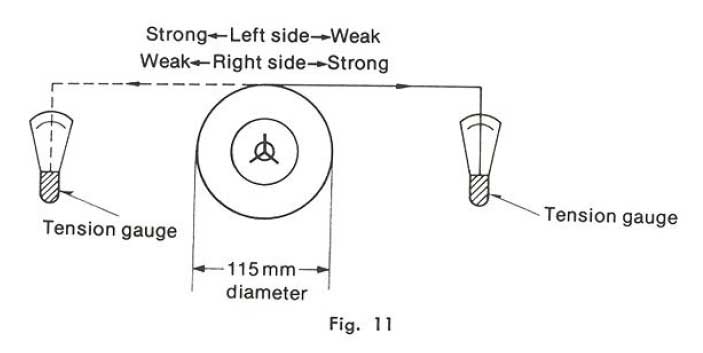
During the playback of a 10-inch reel, adjust the voltage at IT & IS points. The desired tension levels are 0.31V for IT and 0.21V for IS, as outlined on page 16 of the service manual (part 2).
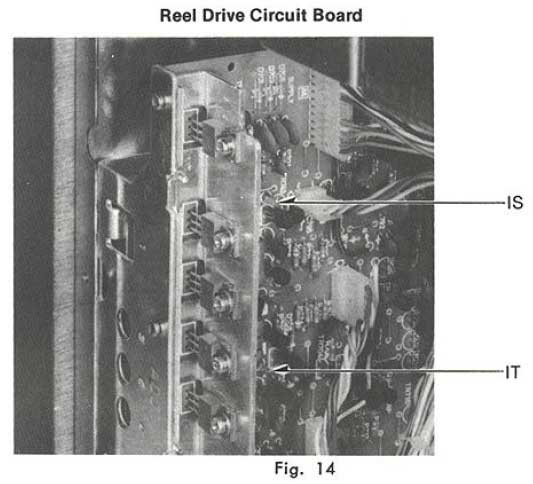
To verify the tension mechanically, a tentelometer is required.
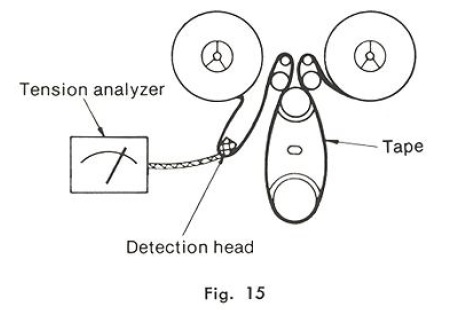
If you don’t have access to one, consider borrowing this accessory, as I did from the shop where I purchased my decks. Fortunately, everything matched the specs.
Technics RS 1500 Project 4: Audio Calibration
After going through a complete recap, it is also highly recommended to ensure that the audio section is still functioning properly.
For audio calibration guidance, you can watch this great video made by Nick Adams:
Video: Technics RS1500 Service and Calibration
In the video, he covers the essential checks and explains the process in a clear and comprehensive manner.
You will need a calibration tape for some checks, and I got mine from NikElektro.
You can find yours by searching: “All-in-One Calibration Tape 15 IPS for Technics” on Ebay. The seller name is ural91.
Technics RS 1500 Project 5: Reel Brakes Adjustment
The original felt pads had lost their effectiveness due to wear and glazing. I experimented with different replacement materials, including felt, rubber, and a combination of rubber and felt, but none yielded satisfactory results.
The solution that proved effective is using cork. I acquired adhesive cork sheets in various thicknesses and cut them to the appropriate size. A thickness of 2mm worked perfectly. To secure the pads, I applied a bit of adhesive to ensure they stay in place.
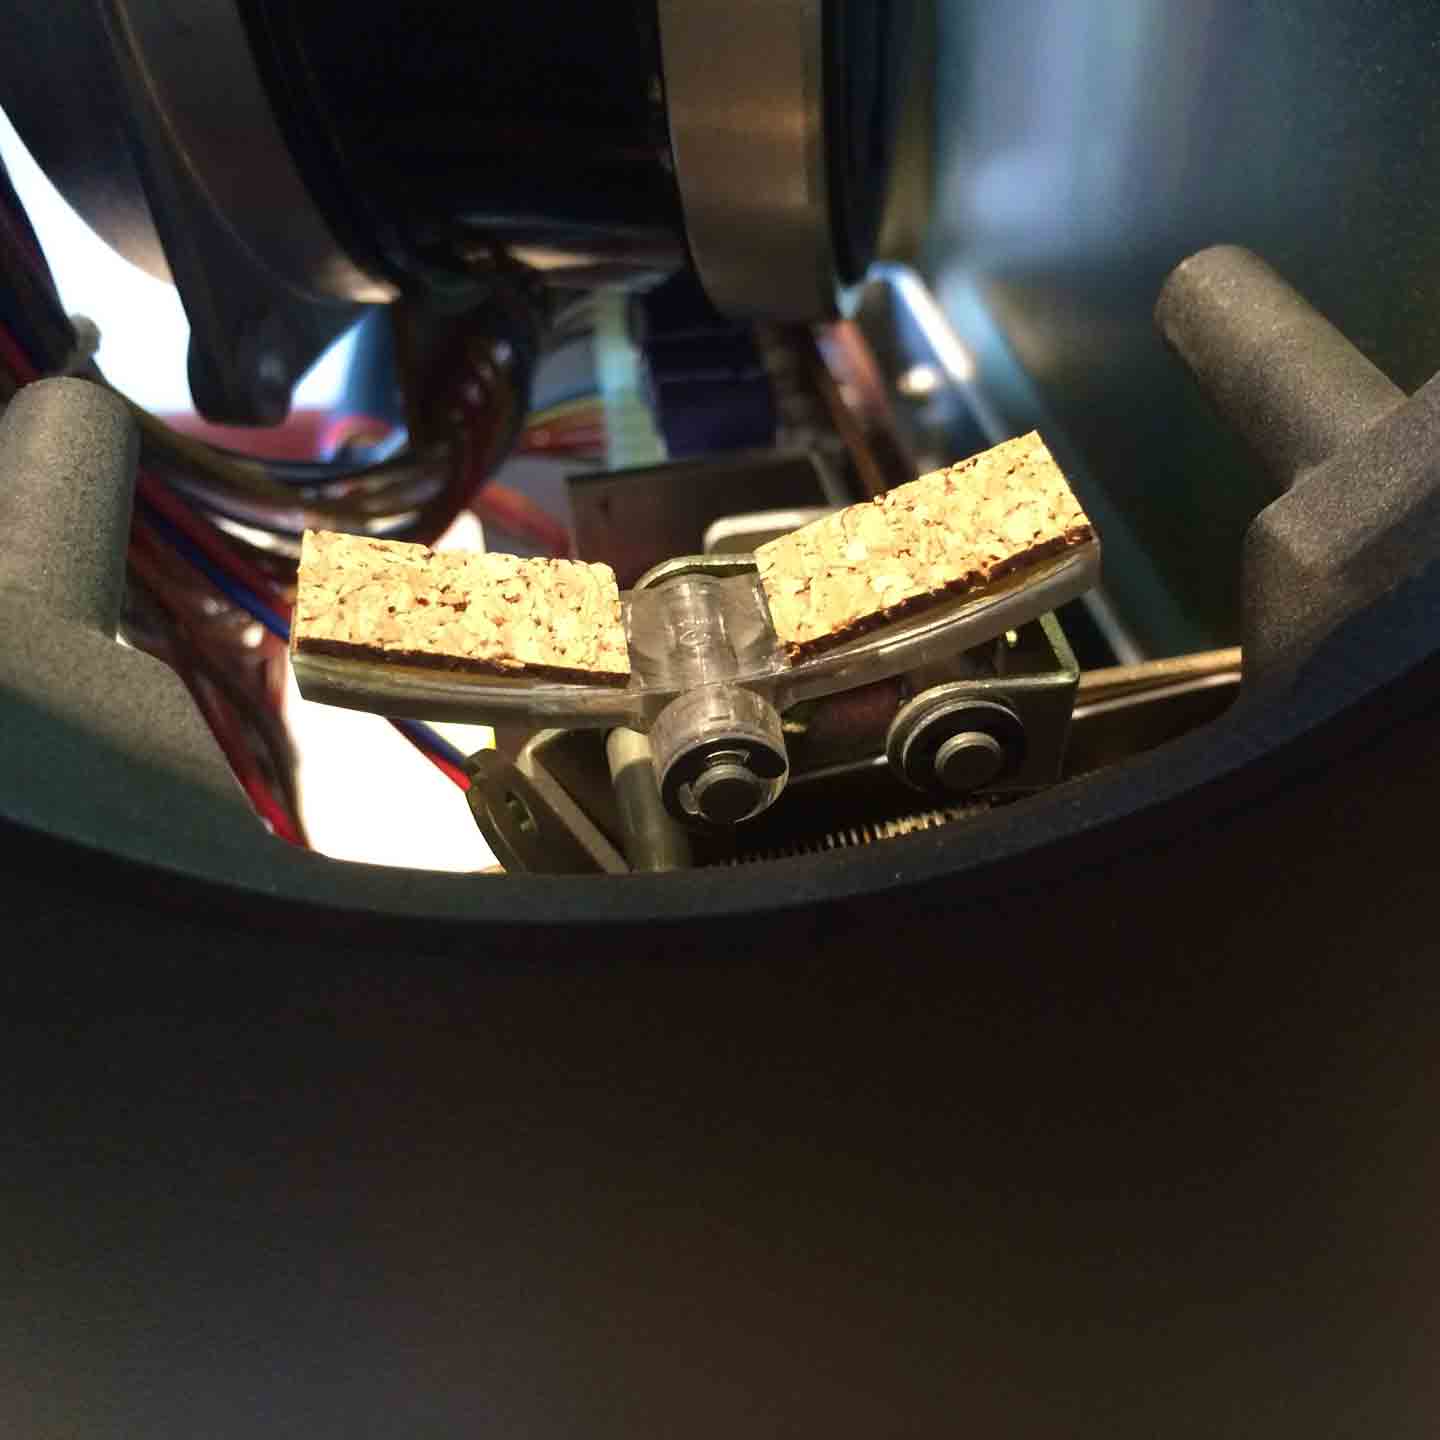
Once the replacement is complete, it’s advisable to assess the braking force of the reel motors using a tension gauge, as outlined in the service manual (p14).
I used a small rope as a substitute for the end of the tape to minimize waste. If you discover that your braking force is excessively high, it’s likely due to the brake pads making contact with the reel(s), which can result in high wow and flutter.
Technics RS 1500 Project 6: Tape Heads Relapping
If you’ve completed the aforementioned steps successfully, congratulations! Your RS-1500 should now be operating flawlessly.
However, if you’ve observed that your heads exhibit signs of wear (such as a substantial flat spot at the head poles) or severe oxidation, you may need to consider the process of relapping.
In such a scenario, you can refer to the following guide for detailed instructions:
The Technics RS 1500 Project: Conclusion
I hope you have discovered valuable insights in this article. This restoration project, completed in 2018, presented significant challenges, but the rewards have been substantial. Since then, these decks have operated flawlessly and delivered outstanding audio quality.
The Technics RS-1500 is a captivating and intricate piece of stereo equipment. If you’re considering a restoration, it’s worth noting that there are simpler machines to work on. For instance, I have fully refurbished a Revox B77 MKII High Speed, which was notably easier in comparison to the Technics 1500.
Whether it’s the RS-1500, RS-1506, RS-1700, or the remarkable RS-1520, Technics reel-to-reel decks hold a special place in the world of analog sound. I sincerely hope that many of these exceptional pieces of equipment are lovingly restored to their original specifications.
Here is to the enduring allure of analog sound!

L’Or du Son
The analog sound newsletter
A monthly selection of analog news, gear reviews, record releases and music discoveries, curated to keep you inspired and connected to the world of analog sound.
Gregory de Richemont
Gregory de Richemont is the founder of Le Son, where high-fidelity sound is approached as both a technical pursuit and an emotional experience. After a career in international business, he followed a more personal path into analog playback, music and craftsmanship. His work is dedicated to listening experiences that do more than impress: they create a deeper connection with music. Learn more on our About page.